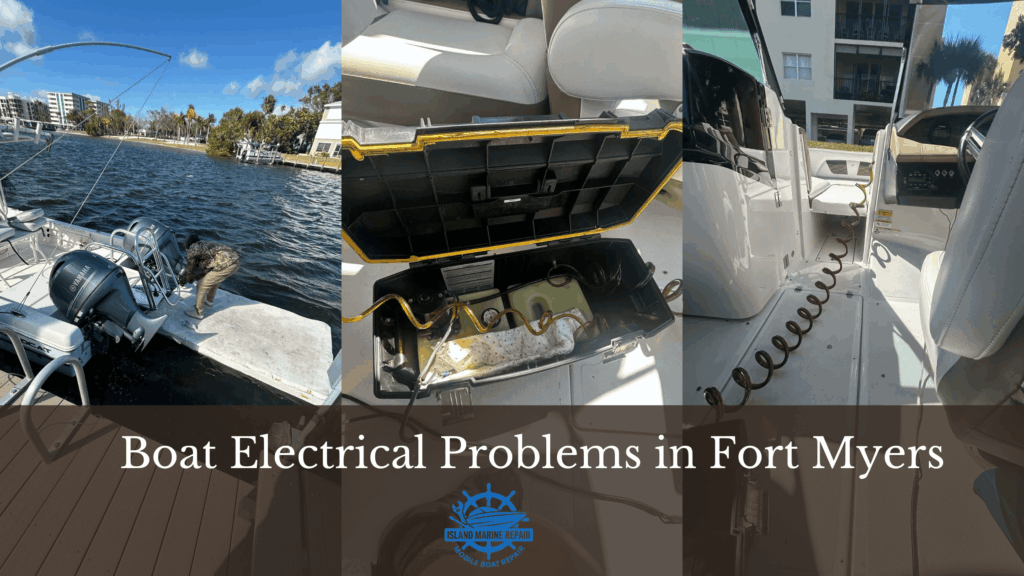
If you have ever turned the key on your boat and been met with silence, or watched your navigation lights flicker out right before sunset near Sanibel Island, you already know the frustration of marine electrical problems. Fort Myers and the surrounding Southwest Florida coastline create some of the harshest conditions imaginable for boat wiring, batteries, and electronics. The combination of salt air, relentless humidity, and summer heat puts constant stress on every electrical component aboard your vessel.
The good news is that most boat electrical failures follow predictable patterns. Once you understand what causes them and how to spot early warning signs, you can prevent the majority of breakdowns before they leave you stranded in Pine Island Sound or stuck at the dock on a perfect fishing morning.
This guide breaks down every major electrical problem Fort Myers boaters face, explains exactly what is happening inside your boat’s electrical system, and walks you through the fixes that actually work in our unique saltwater environment.
Why Fort Myers Is One of the Toughest Places in the Country for Boat Electrical Systems
Before diving into specific problems, it helps to understand why boats in Southwest Florida develop electrical issues faster than boats in almost any other region.
Saltwater is an excellent conductor of electricity. That sounds like it should be a good thing, but it means salt residue on your wiring, terminals, and connections creates unintended pathways for current to flow. Electricity leaks where it should not, drains batteries overnight, and corrodes metal components from the inside out.
Fort Myers also sits in one of the highest humidity zones in the continental United States. That moisture settles on every exposed surface of your electrical system, especially during the overnight hours when temperatures drop just enough for condensation to form behind your dash panels and inside your fuse blocks.
Add in summer temperatures that regularly exceed 95 degrees, and you have an environment that accelerates chemical reactions inside batteries, softens wire insulation, and causes thermal expansion that loosens terminal connections over time.
Marine surveyors working in Lee County consistently report that corrosion, degraded wire insulation, faulty grounding, and improperly installed wiring are among the most common findings during pre-purchase inspections. These are not random failures. They are the direct result of boating in one of the most electrically demanding environments in the world.
The Six Most Common Boat Electrical Problems in Fort Myers
1. Corroded Connections and Terminals
This is the number one electrical issue for boats in SWFL, and it is not even close. If you pop open the battery compartment on almost any boat that has spent a season in Fort Myers waters, you will find green or white crusty buildup on the battery posts, ground blocks, or switch terminals.
That buildup is corrosion, and it increases electrical resistance at every connection point it touches. Higher resistance means less voltage gets through to your components. Your lights dim. Your bilge pump runs slower. Your engine cranks weakly even though the battery tested fine last week.
What causes it: Saltwater spray lands on exposed terminals. Humidity traps moisture against metal surfaces. Over time, oxidation builds up layer by layer. The process accelerates dramatically during summer months when humidity levels stay above 80 percent for weeks at a time.
How to spot it: Look for green, white, or bluish powder on battery posts, ground bus bars, fuse block pins, and the back side of toggle switches. Even connections that look clean on the outside can have corrosion hiding underneath the wire crimp.
How to fix it:
Disconnect the battery before working on any electrical connection. Mix a tablespoon of baking soda into a cup of warm water and use a wire brush to scrub away the corrosion. Rinse with fresh water and dry the connection completely. Once clean, apply a generous coat of dielectric grease or a marine-grade corrosion inhibitor like Permatex or Dow 111 silicone grease. This creates a moisture barrier that prevents new corrosion from forming.
If terminals are severely pitted or crumbling, replace them entirely with marine-grade tinned copper terminals. Standard automotive terminals will corrode again within weeks in our climate.
Prevention: Inspect every visible connection on your boat once a month. Re-apply dielectric grease during every service visit. This one habit alone prevents more electrical failures than any other single maintenance step.
If you are dealing with widespread corrosion across multiple circuits, it may be time to consider a full boat rewiring service to replace degraded connections with properly sealed, marine-grade components.

2. Dead or Weak Batteries
Batteries fail faster in Fort Myers than in most other parts of the country, and the reason might surprise you. Most boaters assume cold weather kills batteries, but in Southwest Florida, the opposite is true. High heat accelerates the internal chemical reactions inside lead-acid batteries, causing the plates to degrade faster and shortening the overall lifespan by as much as 30 to 40 percent compared to cooler climates.
What causes it: Heat drives sulfation, which is the buildup of lead sulfate crystals on the battery plates. Once sulfation sets in, the battery loses its ability to hold a full charge. High humidity also creates a thin film of moisture and salt on the top of the battery case, which acts as a conductor and allows a slow “surface discharge” that drains the battery even when nothing is turned on.
Parasitic draws are another common culprit. A bilge pump float switch that cycles during heavy rain, a stereo head unit that stays partially powered, or a poorly installed LED light bar can pull enough current to flatten a battery over a weekend of sitting at the dock.
How to spot it: Use a multimeter to check resting voltage. A fully charged 12-volt marine battery should read approximately 12.6 volts. Anything below 12.0 volts usually means the battery cannot reliably power your electronics or start your engine. If your battery drops below 12.4 volts within a day of charging, sulfation or internal cell damage is likely.
How to fix it:
Start by cleaning the battery terminals and the top of the battery case to eliminate surface discharge. Test the battery under load using a load tester, not just a multimeter. A battery can show 12.6 volts at rest but collapse under the amperage draw of a starter motor.
If the battery is more than three years old in our climate, replacement is usually the most cost-effective option. Choose a marine deep-cycle or AGM battery rated for your boat’s electrical demands. AGM batteries handle heat better than flooded lead-acid batteries and resist vibration damage from wave impact.
To check for parasitic draws, disconnect the negative cable and connect your multimeter in series between the cable and the battery post. A healthy boat should draw less than 50 milliamps with everything turned off. Anything higher means something is staying powered when it should not be.
Prevention: Install a smart marine battery charger that maintains float voltage without overcharging, especially important during summer months when electrolyte can boil off in flooded batteries. If your boat sits for more than a week between uses, a maintainer is not optional in Fort Myers. It is essential.
3. Faulty Wiring and Loose Connections
Vibration is a constant factor on boats. Every wave impact, every engine cycle, and every wake crossing sends micro-vibrations through the hull that gradually loosen friction-fit connectors, back out screws on terminal blocks, and chafe wires against fiberglass edges.
In Fort Myers, this mechanical wear combines with salt corrosion to create what marine electricians call “unwanted opens,” which are breaks in the electrical circuit that cause intermittent or complete power loss to individual components.
What causes it: Many boats, especially older vessels or those with aftermarket electronics, contain a mix of marine-grade and automotive-grade wiring. Standard copper wire used in cars lacks the tin coating that protects marine wire from salt air corrosion. Once salt penetrates the insulation of a standard copper wire, it “wicks” up the conductor like a straw, turning the copper into brittle green powder from the inside.
Poor crimps from previous repairs, wire nuts (which should never be used on a boat), and butt connectors without heat-shrink sealing are also frequent culprits.
How to spot it: Look for wires with cracked, brittle, or discolored insulation. Pull gently on each connection at your fuse block and battery terminals. If a wire moves in its connector, it was already failing. Use a multimeter to check for voltage drops along circuits. Start at the battery and measure voltage at each connection point moving toward the device. A drop of more than 0.5 volts across a single connection indicates high resistance from corrosion or a bad crimp.

How to fix it:
Replace any damaged wire with marine-grade tinned copper wire sized appropriately for the circuit’s amperage. Use adhesive-lined heat-shrink butt connectors for all splices. The adhesive inside the tubing melts when heated with a heat gun, creating a waterproof seal that salt air cannot penetrate.
For connections at terminal blocks, use ring terminals with a proper crimp tool, not pliers. Tighten with a torque wrench or at minimum ensure the connection cannot be pulled loose by hand.
Prevention: Perform a “tug test” on your wiring connections every three months. If any wire feels crunchy when you flex it, or pulls free from its connector, replace it immediately before the problem spreads. For a deeper understanding of marine wiring best practices, check out this guide to boat electrical wiring basics for Florida boaters.
4. Charging System Failures
Your alternator is responsible for keeping your batteries charged while the engine is running. When it fails, or when the voltage regulator that controls its output malfunctions, your batteries slowly drain during every trip until eventually the engine will not restart.
Charging system failures often go unnoticed because the engine runs fine on the battery’s existing charge. The problem only becomes obvious when you try to start the engine after anchoring for lunch at Cabbage Key and discover the battery is dead.
What causes it: Corroded wiring between the alternator and the battery bank, worn alternator brushes, failed diodes inside the alternator, or a voltage regulator that has drifted out of specification due to heat exposure. Boats that have added electronics like large stereo systems, multiple GPS units, or LED light bars after purchase often overload the stock charging system without upgrading the alternator output.
How to spot it: With the engine running at cruising RPM, measure voltage at the battery terminals. You should see between 13.5 and 14.5 volts. Below 13.5 volts means the alternator is undercharging. Above 14.8 volts means the regulator has failed and is overcharging, which can boil battery electrolyte and cause a dangerous situation.
How to fix it:
Check the belt tension and condition first. A slipping belt is the cheapest and easiest fix. Next, inspect the wiring from the alternator to the battery for corrosion or loose connections. If those check out, the alternator itself needs bench testing. Replace worn brushes, failed diodes, or the entire unit if the output is below specification.
For boats with heavy electrical loads, consider upgrading to a higher-output alternator paired with an external smart regulator. This ensures your battery bank receives a proper multi-stage charge cycle instead of the simple bulk charge that stock regulators provide.
Prevention: Have your charging system tested annually as part of your routine service. If you need help diagnosing charging issues or other engine-related electrical faults, Island Marine Repair LLC offers marine engine diagnostics that include comprehensive charging system evaluation.

5. Grounding Problems and Stray Current
Grounding issues are some of the most confusing electrical problems on a boat because the symptoms seem random. Your navigation lights flicker when you turn on the bilge pump. Your VHF radio produces static when the trim tabs are activated. Your fishfinder screen resets every time the livewell pump cycles.
All of these point to a shared ground path that is not handling the current load properly.
What causes it: In a boat’s DC electrical system, all components share a common negative ground that returns current to the battery. If one ground connection is loose, corroded, or has high resistance, electricity from one circuit can “bleed” into another circuit as it seeks an alternative path back to the battery.
In Fort Myers, grounding problems are amplified by the fact that corrosion attacks ground connections just as aggressively as positive connections. The ground bus bar, engine block ground strap, and transom ground plate are all vulnerable.
How to spot it: The classic sign is electronics behaving erratically when other devices are turned on or off. If your GPS restarts when you hit the trim switch, or your depth finder reads erratically when the bilge pump runs, a grounding issue is almost certainly the cause.
Use a multimeter to measure voltage between the engine block and the battery negative post with the engine running. You should see less than 0.1 volts. Anything higher indicates a poor ground connection somewhere in the circuit.
How to fix it:
Locate your main ground bus bar, which is usually behind the helm console or near the battery switch. Remove each wire one at a time, clean the ring terminal and the bus bar surface with a wire brush or sandpaper, apply dielectric grease, and retighten. Pay special attention to the engine block ground strap and any bonding wires connected to through-hull fittings.
If you discover that previous wiring work used “daisy-chained” grounds (where one wire grounds to another wire instead of directly to the bus bar), rewire each circuit with its own dedicated ground run back to the bus bar. This eliminates the shared path that causes cross-circuit interference.
6. Shore Power Risks at Local Marinas
If you keep your boat in a slip at Cape Coral, Fort Myers Beach, or any marina along the Caloosahatchee, shore power connections introduce a unique set of electrical hazards that dockside boats do not face.
What causes it: When your boat is plugged into shore power, it shares an AC ground connection with every other boat on the dock through the marina’s wiring. If the boat in the next slip has a ground fault or leaking current, your boat’s underwater metals, including the propeller, drive shaft, and through-hulls, can become the sacrificial anode for the entire dock.
This is called galvanic corrosion, and in severe cases it can dissolve a propeller or corrode a drive unit within a single season.
Additionally, frequent plugging and unplugging wears down shore power inlets and cord connections, creating arcing faults that are one of the leading causes of marina fires.
How to spot it: Check your zinc anodes frequently. If they are disappearing much faster than normal, galvanic corrosion from shore power is likely the cause. Inspect your shore power cord and inlet for signs of heat damage, discoloration, or pitting on the prongs.
How to fix it:
Install a galvanic isolator on your shore power ground wire. This device blocks low-voltage DC galvanic currents while still allowing the AC safety ground to function normally. For maximum protection, an isolation transformer completely separates your boat’s electrical system from the marina’s ground.
Replace any shore power cords that show signs of heat damage or corrosion on the connectors. Test your boat’s AC system with a polarity tester every time you plug in at a new slip.
Step-by-Step Troubleshooting for Any Boat Electrical Issue
When something electrical stops working on your boat, resist the urge to start replacing parts. A systematic approach saves time and money.
Step 1: Safety first. Disconnect the battery before touching any wiring. If you are dealing with an AC shore power issue, disconnect the shore power cord at the dock pedestal first, then at the boat.
Step 2: Check the obvious. Verify that the battery switch is in the correct position. Check that the battery voltage reads at least 12.4 volts. Look at the fuse panel for any blown fuses or tripped breakers.
Step 3: Use a multimeter. Test voltage at the device that is not working. If there is no voltage, trace backward toward the battery, testing at each connection point until you find where the voltage disappears. That is your problem area.
Step 4: Inspect visually. Look for corrosion, melted insulation, burn marks, or loose wires at every connection in the affected circuit. Pay special attention to areas where wires pass through bulkheads or run near heat sources.
Step 5: Isolate the circuit. Disconnect other devices on the same circuit to determine whether the problem is in the wiring, the switch, or the device itself.
Step 6: Know your limits. If you find melted wires, smell burning, or cannot isolate the problem after these steps, stop working and call a professional. Electrical fires on boats are extremely dangerous, and the risk is never worth saving a service call.
Understanding why DIY electrical repairs are risky on Florida boats can help you make the right call about when to pick up the phone instead of the wire strippers.
When to Call a Professional Marine Electrician
Simple tasks like cleaning battery terminals, replacing a blown fuse, or swapping out zinc anodes are well within the ability of most handy boat owners. But several situations require professional expertise to ensure safety and ABYC compliance.
Call a certified marine electrician if you notice a burning smell or see melted wire insulation anywhere on the boat. Repeated fuse failures on the same circuit indicate a short that requires professional diagnosis. Complete power loss that does not respond to basic troubleshooting usually points to a wiring failure buried inside the boat’s harness. Any work involving AC shore power systems, inverters, or lithium battery installations should always be handled by a qualified technician.
For Fort Myers boat owners, Island Marine Repair LLC provides mobile marine electrical service directly at your dock or marina. Their technicians handle everything from bilge pump installation and repair to complete electrical system overhauls, using marine-grade components designed to withstand the SWFL environment.
Professional diagnostic rates in the Fort Myers area typically run between $100 and $200 per hour, with most electrical issues diagnosed within the first hour. Battery replacement costs range from $150 to $600 depending on the battery type, and complete rewiring projects vary based on the size and complexity of the vessel.
Prevention Tips That Actually Work in Southwest Florida
Keeping your boat’s electrical system healthy in Fort Myers comes down to consistent habits, not expensive upgrades.
After every trip: Rinse the entire boat with fresh water, paying special attention to battery compartments, fuse panels, and any exposed wiring connections. Salt spray settles everywhere, and a five-minute rinse prevents weeks of accelerated corrosion.
Monthly: Clean all accessible terminals with a wire brush and reapply dielectric grease. Test your battery voltage and check your bilge pump operation manually.
Every six months: Inspect all wiring runs for chafing, cracked insulation, or discoloration. Check zinc anodes and replace any that are more than 50 percent depleted. Test your shore power cord and inlet connections.
Annually: Schedule a professional electrical inspection, ideally before hurricane season. A qualified technician can use thermal imaging and load testing to find problems that are invisible to visual inspection.
Use only marine-grade components for any repair or upgrade. Tinned copper wire, adhesive-lined heat-shrink connectors, and sealed fuse blocks cost slightly more than automotive equivalents, but they last years longer in our saltwater environment. The upfront investment pays for itself many times over in avoided repairs.
If your boat sits for extended periods, install a quality smart charger and consider adding a battery monitor that tracks voltage, current draw, and state of charge in real time. These tools take the guesswork out of battery management and alert you to problems before they strand you on the water.
Final Thoughts
Most boat electrical problems in Fort Myers come down to two things: corrosion and poor maintenance. Both are entirely preventable with regular attention and the right materials.
The salt air, humidity, and heat are not going away. But by understanding how these forces attack your electrical system, staying on top of monthly inspections, and using marine-grade components for every repair, you can keep your boat reliable and safe for years of Southwest Florida boating.
Small problems always become big problems if ignored. A corroded terminal that costs five minutes to clean today can turn into a complete wiring harness replacement if left for a season. A weak battery that could have been saved with a maintainer becomes an engine that will not start in the middle of Charlotte Harbor.
Stay ahead of the salt. Stay ahead of the corrosion. And when something does not look right, address it before your next trip.
If you are dealing with an electrical issue right now, or if it has been more than a year since your last electrical inspection, reach out to a qualified Fort Myers mobile marine mechanic for a diagnostic before the problem gets worse. Your boat and your wallet will thank you.
Island Marine Repair LLC serves Fort Myers, Fort Myers Beach, Cape Coral, Naples, Punta Gorda, Captiva, and Sanibel with professional mobile boat repair and marine electrical services. Call today to schedule dockside service.


